Wet Trimming Vs Dry Trimming: Which Should You Choose
Most growers agree that harvest time is the most rewarding part of the growing cycle. After months of raising your seedlings into mature, bud-laden plants, you’re finally able to sample the fruits of your labour!
However, you still have work to do; you’ll need to properly prepare your flowers for drying, curing, and storage. Do it correctly, and you’ll have buds that look, taste, and smoke better. Trust us; it’s worth your time and effort.
A key step, of course, is trimming the sugar leaves off your buds after clipping branches off the plant. Remember those pristine and nugget-like buds at your local dispensary or coffeeshop? Those are the result of manicuring — another word for trimming. Moving past aesthetics, these buds will also smell better, smoke better, and stay fresher after a good trim.
Let’s dive deeper into why you should trim your harvest, and consider different techniques used to get the job done.
Three Reasons Why A Quality Bud-Trimming Job Is So Important
The simple fact of the matter is, you must trim your buds. Here are the three most important reasons why…
1. Appearance: Because high-value plants are often displayed in glossy magazines, in jars at dispensaries, and at other places for sale, well-manicured buds have become necessary to give your product the appearance of being potent and desirable. So yes, trimming makes your buds more visually appealing and, like it or not, it’s now the new standard.
2. Smoother product: When your final product is ingested, excess leaves on the buds can make for a harsher experience when smoked. But when you trim off the excess, you create a much smoother product to consume, which your customers will thank you for.
3. Trichome concentration: The fact is, the highest concentration of trichomes are found on the buds and much less so in the small leaves surrounding them. Trichomes are like tiny factories that produce the hundreds of known cannabinoids, terpenes, and flavonoids that make for potent, unique, effective, high-value plants. Gram for gram, there are more trichomes in the buds than the leaves, so trim the leaves for maximum potency.
The following introduces you to several different types of bud trimmers, I hope to help you.
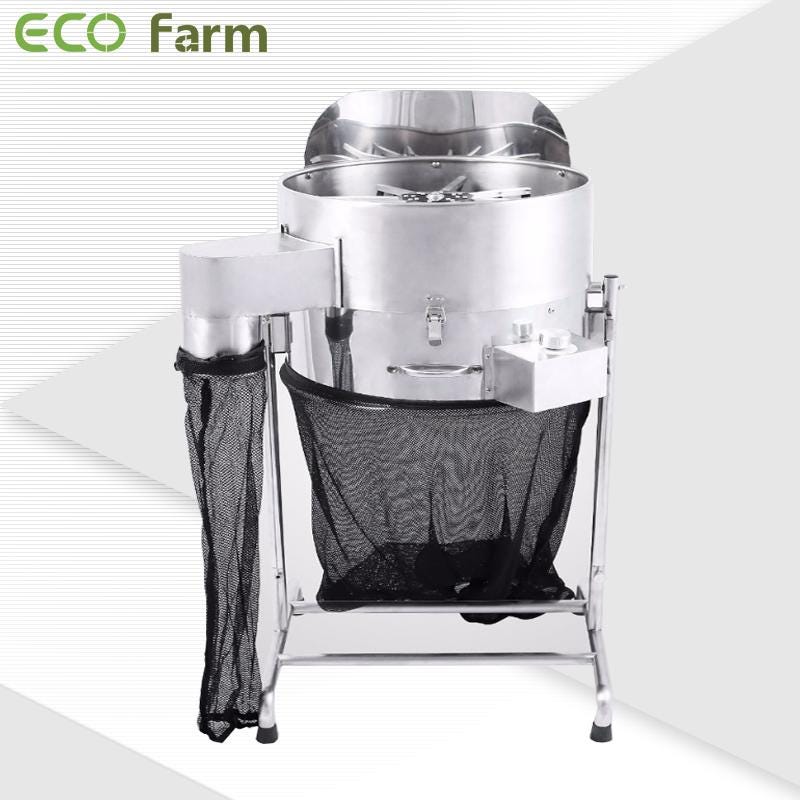
ECO Farm 3 Speed 18 Inch Automatic Bud Leaf Trimmer Machine
Features:
ECO Farm bud trimmer is equipped with a maintenance-free motor and sharp stainless steel (3) blades.
Catch the ball bag-automatically output after completion; equipped with a clean and environmentally friendly handle bag; no garbage will be left
Efficient and precious-pruning excess leaves and stems quickly, efficiently and preciously. Easy to fold design, easy to transport or store
Adjustable speed-high-speed blades and fans pruning rotate, fluffy and finally eject the trimmed plants.
Empty hatch-the empty hatch can be opened when the machine is running to ensure uninterrupted production capacity
Power supply type: wired electrical
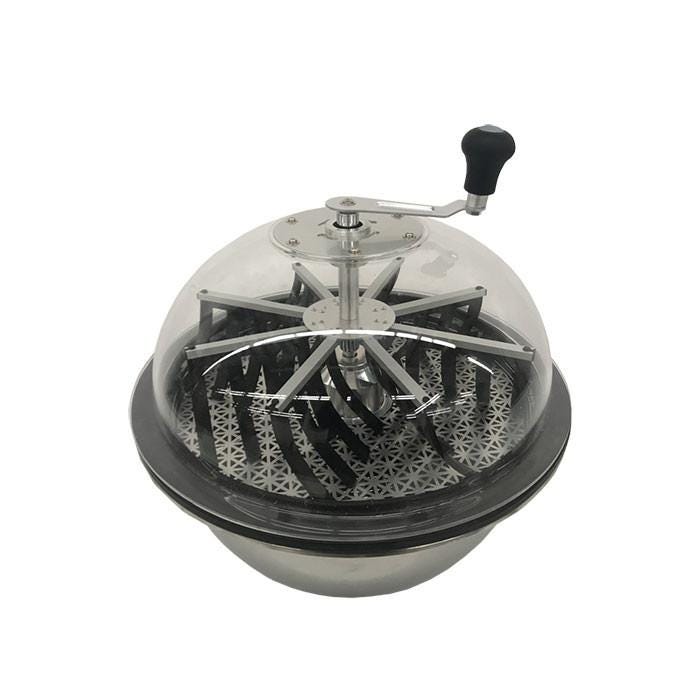
EZTRIM NanoSat Wet or Dry Bowl Trimmer
Features:
EZTRIM NANOSAT is the only salad bowl trimmer on the market that can be trimmed wet or dry. Connoisseur-level pruning can be done quickly and easily with a relatively small investment. Super Lightweight, can be easily carry.
Compact design requires minimal space.
The detachable design makes it easy to clean every part.
With stainless steel twist spin blades. The blade is sharp and can easily trim leaves and flowers.
The product has a huge plastic cover, which can be seen clearly while working. It is easy to operate and will not accidentally damage the leaves and flowers

Features:
Kairos Trimmers cooperates with some of the leading blade manufacturing companies in the United States, using cutting-edge technology to bring you a new blade design. The high-precision oblique cutting blade gently cuts your product, never directly chopped or mashed your product
The Kairos field cultivator gently rolls the flower buds onto the blade with customizable pressure from the down brush, providing a consistent finish and high-quality trimming to the extract.
An easy-to-read digital timer allows progress to be monitored without interrupting duties and tasks
Reliable: The unique bowl design speeds up the mixing speed, fast and powerful cleaning,
Easy to use: clean the lid to monitor the rolling action,
Convenience: remove dirt, lubricating oil and oxidation quickly and easily;
How To Wet Trim: A Step-By-Step Guide
It’s harvest time, and you’re ready to trim your plants. Here’s our easy-to-follow guide on how to do a wet trim…
1. Cut the branches with buds into manageable sizes. You’ll use your large shears to cut through the thicker branches. It’s pretty simple — to easily handle them, just make sure the branches attached to the buds aren’t too short or too long. Place them gently in a container and bring to your workstation where you’ll finish trimming.
TIP: Because your buds are still wet, they are softer and so laying them down can flatten them. To protect the buds, some growers will hang them from a line, similar to hanging wet clothes.
2. Remove fan leaves. First, you’ll want to remove any large fan leaves, a.k.a water leaves. These are the larger leaves that are bright green and with no “sugar.”
3. Close manicure the small leaves. Next, you’ll want to go ahead and trim the so-called sugar leaves, which are the small leaves that stick out of buds. How you trim these and how much is up to you. Some people like to leave them on if they’re covered in trichomes instead of trimming them. The more you remove, the less harsh your product. We recommend removing all of them, but trim your buds closely over your separate container that’s going to collect all these trichome-covered sugar leaves, so you can use them later for other products.
NOTE: You’ll need to decide how much of the stems you want to remove during this step, which is based on how you’re planning on drying your buds. If you cut the buds entirely off the stems, you’ll have to use something like a drying rack to place the buds on to dry. If you leave a little stem, you can instead hang them from a line to dry.
4. Time to dry. At this point, your buds should be trimmed and looking the way you want them to. You’ve either removed all the stems and placed buds on a drying rack, or you’ll have enough stems left attached with which to hang buds to dry.
Here is the ideal environmental conditions and timeline for drying:
Day 1–3:65 degrees at 55% humidity
Day 4–6:70 degrees at 50% humidity
Day 7–10’ish:73–75 degrees at 45% humidity, until stem breaks evenly and audibly.
5. Time to cure. You’ll want to use airtight jars, similar to glass Mason jars, for curing your buds. After they have dried (i.e., they pass the snap test), put your buds in the jars and follow your curing process.
Pros and cons of wet trimming
Pros:
- It’s easier to access and remove sugar and fan leaves — they get shrivelled and dried up in dry trimming.
- With less moisture-filled foliage attached to the flowers, drying will be quicker. This can be helpful in humid climates where mold is a concern.
- If you’re tight on space, wet trimming removes a bulk of the plant in the beginning, composting stems, stalks, and leaves.
- Trimming wet will also give you a tighter and more aesthetically pleasing final product.
- Many argue that because buds are stickier when being handled, trichomes remain intact, which preserves terpenes and flavors in the final product.
Cons:
Wet trimming is very sticky. Trichomes will get on your fingers, your trimming shears, your body, everything.
How To Dry Trim: A Step-By-Step Guide
Again, we start at harvest time…
1. Cut the branches with buds into manageable sizes. Similarly to wet trimming, you’ll start by using your large shears to cut through the thicker branches. It’s pretty simple — just make sure the branches attached to the buds aren’t too short or too long for you to easily handle them. Place them gently in a container and bring to your workstation where you’ll finish trimming.
2. Remove fan leaves. Again, the first step is to remove any large fan leaves (a.k.a. water leaves). These are the larger leaves that are green, and with no “sugar.”
3. Hang to dry. Following are the ideal environmental conditions and timeline for drying:
Day 1–3:65 degrees at 55% humidity
Day 4–6:70 degrees at 50% humidity
Day 7–10’ish:73–75 degrees at 45% humidity, until stem breaks evenly and audibly.
Now you’ll have a short break between the first steps in the trimming process and finishing your buds, so keep that in mind for planning purposes. You’ll continue to let your buds dry until they pass the snap test. When that stem snap is audible and crisp, they’re dry and ready to be trimmed.
4. Close manicure small leaves after drying. Time to trim the so-called sugar leaves, which are the small leaves that stick out of buds. Again, we recommend removing all of them to make a less-harsh product. Plus, it makes buds look better. But don’t forget to trim your buds closely over your separate container, which will collect all the trimmings to be used later. This is basically the last step of the trimming process, so continue trimming until your buds are the desired shape. They should look how you want your final product to look when displayed on the shelf.
5. Time to cure. This is the final step, where you seal the buds inside your airtight jars.
Pros and cons of dry trimming
Pros:
- Keeping leaves on in the beginning increases humidity around the buds and slows down drying. This can be great in arid climates, as a quick dry can cause excess terpene loss.
- It’s a lot less messy — trichomes harden as weed dries, reducing the amount of get-on-everything stickiness.
Cons:
- Those less-sticky, less-messy trichomes are also more brittle and prone to breakage. You’ll have to handle your crop with care to preserve trichomes and THC levels.
- Hanging entire plants takes up significantly more space than if you chopped it off in the first place. Make sure you have adequate drying space before dry trimming.
What To Do With The Leftover Trim
After trimming your entire harvest, your collection tray will be filled — or overflowing — with stems, stalks, fan leaves, and sugar leaves. Although these components might seem like waste material, you can actually put this trim to good use.
No, you won’t want to smoke them, but all of these parts contain cannabinoid and terpene stores. You can use them to make all sorts of homemade products that’ll have you feeling those good herbal vibes.
Growers can get especially experimental with sugar leaves. They aren’t the best to smoke, but you can use them to make some quality cannabutter, some sugar leaf tea, or even some tasty kief to add to your bud.
Likewise, you can use the stems to make an assortment of extracts and concentrates. We believe the best uses for cannabis stems include:
• Charas
• Kief
• Bubble hash
• Tea and chai
• THC butter
• Topicals
Conclusion
No matter who you ask, some growers will prefer wet trimming, and some will prefer dry trimming. While newer growers tend to lean toward wet trimming for its accessibility, more advanced growers might prefer dry trimming for it’s near-artisanal practice.
But as with everything when it comes to growing, harvesting and trimming, it’s all preference. If you’re committed to the dry trim but it’s your first time, don’t stress. And likewise if you’ve been dry trimming for years and want to give a wet trim a go, do it.


评论
发表评论