VIPARSPECTRA 96"x48"x80" Reflective 600D Mylar Grow Tent VS Finnhomy 600D Mylar Hydroponic Grow Tent
A grow room allows you to control temperature, humidity, and most importantly, prevent light leaks and eliminate odors. Regardless of what everyone thinks, you can build a cheap grow tent if you know what materials to use and how to build it, here are some DIY grow tent ideas that will help you save money and start growing right away.
So read on for how to build an indoor grow tent!
What are the benefits of using a grow tent?
If you plan to grow plants indoors, there are many good reasons to use a grow tent. Here are some of those benefits:
They allow you to create the ideal growing environment for plants because you can control temperature, humidity, ventilation and lighting.
They keep pests out. It’s true that there are fewer pests to deal with indoors than outdoors; however, chewing bugs can find their way inside. Grow tents help keep those bugs out of the plants.
A grow tent hides plants from prying eyes.
Grow tents also help hide the smells that plants produce.
They concentrate any debris such as soil, water, fallen leaves, etc. in one place, making for a tidier indoor growing.
All of these benefits combined will allow you to take advantage of the greatest benefits of growing plants indoors using grow tents: healthier, stronger crops and richer yields.
VIPARSPECTRA 96"x48"x80" Reflective 600D Mylar Grow Tent
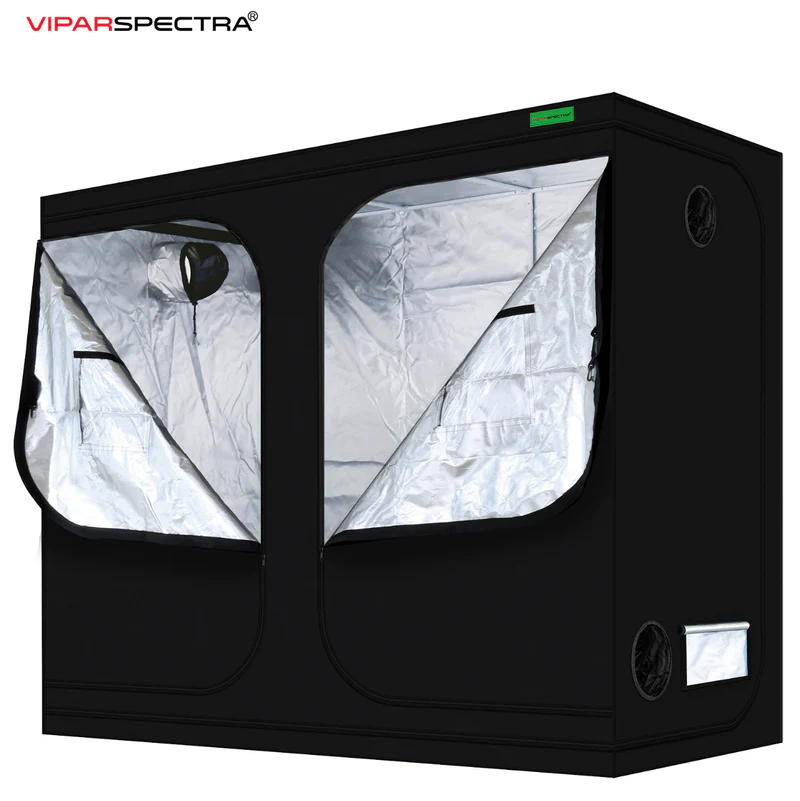
Features:
This VIPARSPECTRA grow tent features double stitching and high-quality zippers to prevent light leaks, ensuring durability and long-lasting use. Updated zipper to make it easy to open and close. Multiple vents accommodate fans and filters, and mesh-ducted rectangular windows keep dust and insects out for better ventilation. Mylar tray is removable. Completely light and reflective ripstop mylar including removable mylar floor tray. Reflective material enhances the intensity of the grow light. The Easy-View window allows you to peer inside and observe plant growth easily and comfortably. Sturdy metal poles and sturdy metal corner connectors will support your grow tent frame and lock your structure securely in place.
Finnhomy 600D Mylar Hydroponic Grow Tent
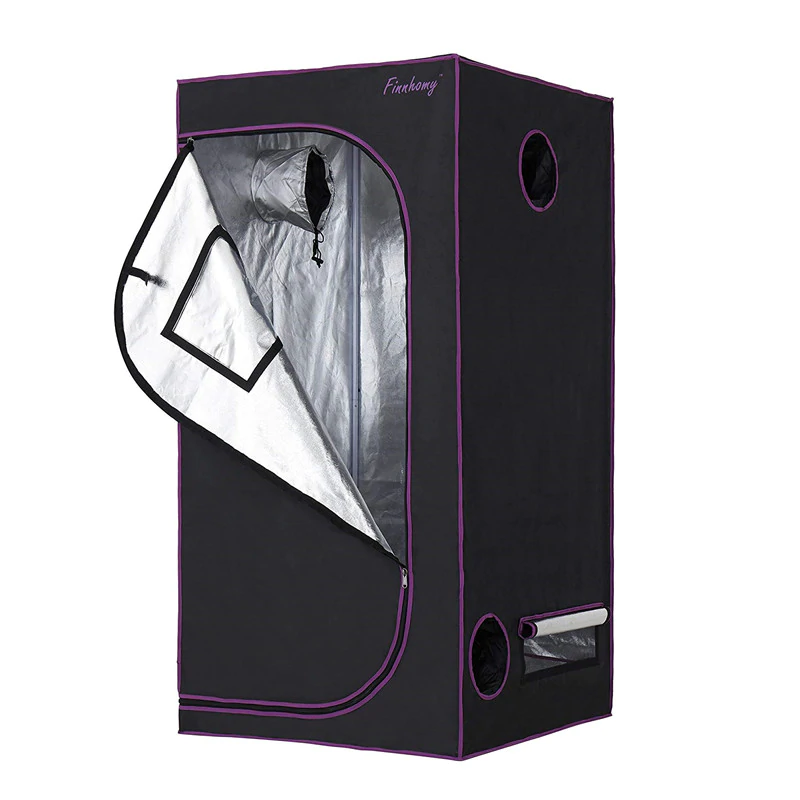
Features:
This grow tent is made of 600D oxford, which is ripstop, and the double seam process ensures durable and long-lasting use. The high quality tent material is reinforced with thick metal poles that can hold up to 150 lbs and keep plants growing well. Over 95% reflective Mylar interior returns up to 92–97% of the grow bulb’s light back to your plants and herbs. Removable Mylar floor tray enhances 100% reflection. The system contains several pipe ports with pull cords. There are also multiple rectangular mesh ventilation windows with integrated flaps to control the flow of light in and out. It use SBS zippers to ensure the door opens smoothly and the viewing window makes it easy to peek at your plants.
How to Set Up Your Grow Tent (Step By Step)
1. Gather all your setup tools and equipment
These tools include wire cutters, screwdrivers, scissors, and the tent, ventilation, lighting, and carbon filter equipment.
2. Assemble the grow tent
First, you will have to assemble the frame and then place the canvas on the frame. The cloth may be a light nylon cover or a heavy canvas. Check to make sure that the tent zippers work and that the seams are not defective.
3. Set up the grow lamp
Assemble the holders for your light. Most grow lamps come with mounting hardware for attaching to frame’s crossbars in a tent. Follow those instructions to make sure that you hang the lights at the correct height to cater to your plants’ needs. If you are using a hood, attach it to direct the light downwards onto the plants. Remember to prevent electrical accidents by securing and organizing your wiring system.
4. Ventilation and carbon filter setup
Determine where you want to place your fan and carbon filter within the tent. Hang the carbon filter from one of the tent’s crossbars. Next, hang the exhaust fan so that the fan points not only towards the carbon filter but also towards the grow ventilation opening. After measuring the distance between the carbon filter and the exhaust fan, install a ducting mechanism between the carbon filter and the fan, and then from the exhaust to the ventilation opening in the grow tent. Make sure that the electrical cords reach and can connect to a power source.
5. Hang the temperature and humidity gauge
The last thing you will need, but certainly not least, these help in maintaining an optimal climate in the grow tents
6. Perform a safety scan
A safety scan helps make sure that all the electrical cords are out of the way and that they cannot get wet. Always perform a safety scan!
7. Grow your indoor plants!
Conclusion
We hope this article on the best grow tent reviews helped you learn everything you need to know about the top options on the market. A grow tent is a must have when you are growing plants indoors, you need to make sure your tent is a grow tent that will last long and help your plants grow stronger and healthier!


评论
发表评论